Installing Kali Linux in VirtualBox. Detailed step by step instructions
Kali Linux is a distribution designed for conducting security tests. It can also be used as a desktop OS.
Install it in VirtualBox and use it as an additional operating system. VirtualBox virtualization tool is OS compatible:
- Windows
- Linux
- macOS
- Solaris
Earlier, I took a closer look at creating and configuring a virtual machine.
Installation file format
Kali Linux (like Debian, Linux Mint, and Ubuntu) uses DEB application packages.
Previously, I went into detail about installing in VirtualBox:
– Linux Mint
– Ubuntu
How to download Kali Linux
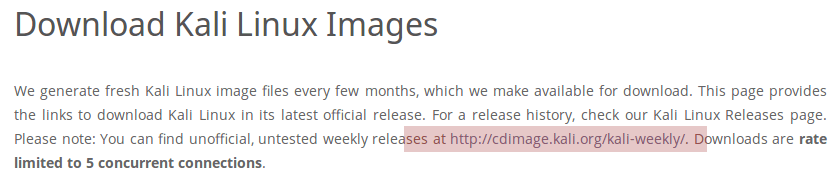
Open the project home page in a web browser. Go to the Downloads section.
For older PCs, select 32-bit OS. The 64-bit version of the system is compatible with most modern computers. Click on the “Torrent” link next to the Kali Linux version that is compatible with your desktop or laptop.
A weekly unofficial release is also available. Follow the link to download it.
Select the version supported by your computer. To start the download, click on the link.
Please wait while loading the operating system ISO image.
Preparing to install
Open VirtualBox. Click the “New” button on the panel located in the main program window under the menu bar.
System type and version
Define basic parameters:
- Virtual machine name: arbitrary
- Type: Linux
- Version: Linux 2.6 / 3.x / 4.x
Bit depth (64-bit or 32-bit) depends on the downloaded OS image. Click on the Next button. Use it to go to the next screen of the New Virtual Machine in VirtualBox wizard.
Allocating RAM and hard disk space
Allocate at least 2 gigabytes of RAM for Kali Linux installation.
Confirm the creation of a new VHD for Kali Linux. Click on the Create button at the bottom right of the current window.
If the created virtual hard disk will be used only in VirtualBox, leave “VDI: VirtualBox Disk Image”. This option will be offered by the program by default.
Suggested options for filling physical storage space:
- Dynamic
- Fixed
In the first case, the size of the virtual drive will adjust to the actual amount of content. I am considering creating a virtual machine with a dynamic hard disk.
Advantage: This approach is more economical.
The second option – the virtual machine will immediately be allocated a certain amount of space on the HDD or SSD of the computer. I recommend it only for those with large hard drives.
Benefit: Faster.
Use the slider or enter a number from the keyboard to specify the size limit for the virtual hard disk. When determining this parameter, consider:
- The physical size of your hard drive or SSD
- Kali Linux Software Installation Plans
- The size of the files that you intend to store on the virtual hard disk
The larger the volume, the lower the likelihood that there will not be enough space for programs and updates.
Click Create
The virtual machine for installing Kali Linux is located in the list on the right side of the main VirtualBox window.
Select it with the mouse and click the New button, second from the left on the panel below the menu bar.
In the “System” section of the “Processor” tab:
- Allocate at least two CPU cores to the virtual machine.
- Click in the white box next to Additional Features: in front of Enable PAE / NX to enable this option.
Ignore the message “Incorrect settings found”.
In the “Network” section:
- Leave the default settings.
- Change them only when you are completely sure that it is necessary.
- Make sure the network adapter is enabled.
On the Advanced tab of the General section, specify the following parameters required for communication between your host operating system and Kali Linux:
- Shared Clipboard: Bidirectional
- Drag’n’Drop Function: Bidirectional
Confirm the changes made by clicking the “OK” button.

Installing Kali Linux in a virtual machine
The Kali Linux Installation Wizard displays detailed recommendations and prompts for each step. Read them carefully.
Double-click to open the virtual machine.
Click the button styled as a folder icon.
Specify the path to the Kali Linux ISO and double-click to open it.
Click on the “Continue” button.
Use the Down arrow on the hardware keyboard to move the selection to the Install line. Press Enter. Continue using this button to go to the next screen of the Kali Linux Installation Wizard.
Setup Wizard Language, Location and Keyboard Layout
Select the language to be used during the installation of the operating system.
Enter a location to consider when setting the time zone.
Define your keyboard layout. The standard Latin keyboard layout is already provided, you do not need to add it.
Assign a key or keyboard shortcut to switch between layouts of your choice and standard Latin.
OS Installer download additional components. It will take some time.
Computer and domain names
Enter a computer name that identifies the system on the network. Use only one word. On a home network, it can be anything, in an office it is determined by the system administrator.
Domain Name: The portion of the Internet address that appears to the right of the computer name. When setting up a home network, it can be arbitrary, but the same for all your machines.
Administrator account
Enter the superuser (administrator) password.
Re-enter your password to confirm your choice.
Create a PC user account
Enter a username that will be used to perform operations other than operating system administration. It will appear in the “From” field in emails you send. Will be used by all programs that require a username.
Enter a name for the account. It must start with a small latin letter and consist of an arbitrary number of latin letters and numbers.
Set user password.
Re-enter the user’s password to confirm.
Exact time
Select your time zone from the list.
Partitioning the disk
Determine the disk partitioning method by selecting one of the list items:
- Auto – use entire disk.
- Auto – use entire disk and configure LVM.
- Auto – use entire disk with encrypted LVM.
- Manually (the user is supposed to create sections).
I am examining the installation of the system using the example of using the entire disk as one partition (the first item in the list).
All data on the drive you choose to install Kali Linux will be erased. In this case, it doesn’t really matter, since the drive was created specifically for installing the distribution kit. In a clean install, before pressing Enter, you need to remember if important data has been backed up. If not, interrupt the OS installation process.
Determine your disk partitioning scheme:
- All files in one section (recommended for beginners).
- Separate partition for / home.
- Separate partitions for / home, / var and / tmp.
Select the first option if this is your first time installing Kali Linux. Give preference to other options when you know why you need it.
To continue installing the OS, select “Finish partitioning and write changes to disk”. If you make a mistake – “Undo section changes”.
The installation wizard will ask: “Write the changes to disk?” The default answer is “No”. To proceed with the installation, and if you are sure of what you have done previously, select Yes.
Automatic installation phase
After formatting the disk, the automatic installation of Kali Linux starts. The installer will display information about the percentage of completion.
In the package manager configuration, confirm to use the mirror from the network. It may contain more recent versions of programs.
If you need to use an HTTP proxy, specify it. If there is no proxy, you do not need to fill in the field.
Installing the bootloader and starting the OS for the first time
Confirm the installation of the GRUB boot loader.
Identify the hard drive to install the boot loader. In this case, the one suggested in the second line.
Preparing the OS for the first launch will take some time.
A message indicating that the installation is complete will appear on the screen. Press Enter to restart.
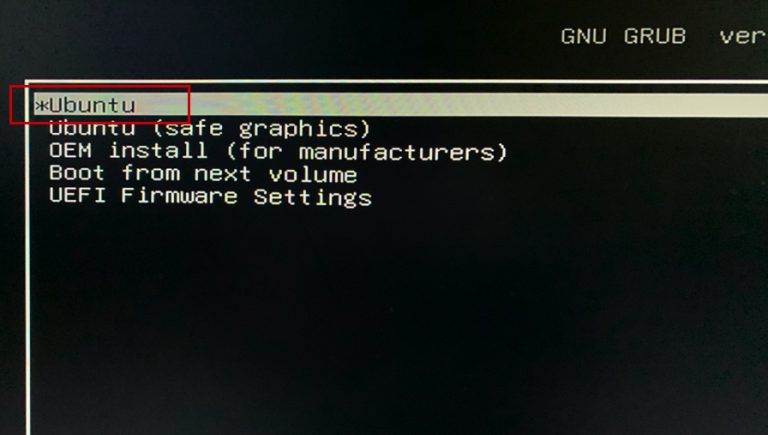
The Kali Linux desktop will open.
Why did you focus on this particular distribution, intended for professionals?